
With FlowAgents you don't buy AI agents with a click in a shop. We set them up together with you, tailored to the tasks your team wants to hand over. The first step is a short request right in the platform. This article explains how it works, what happens next and where to start once your agents are ready.
The overview page
As long as your team has no FlowAgents contract, every link into the area takes you to the overview page. If you don't have access to FlowAgents yourself yet, the sidebar shows only Overview under FlowAgents.
At the top it says Your team gets digital colleagues. Below that, under What you get, you can read what the agents can do: a memory of their own, a browser of their own, working on their own. The point that matters most for you is We handle the setup. You tell us which tasks should be taken over, and we build, test and hand over the agents ready to work. So you don't create agents or servers yourself.
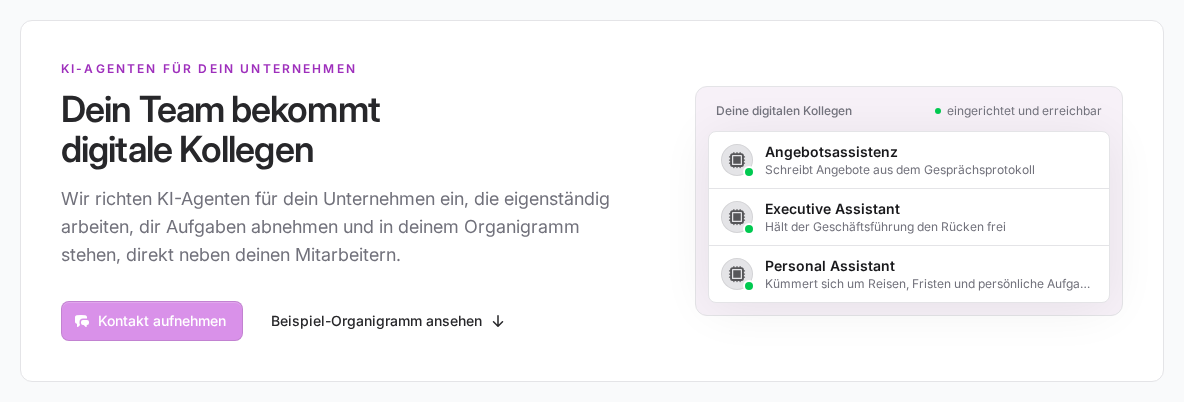
See the example org chart takes you to an org chart with made-up roles. This is what yours will look like later: people and AI agents sit side by side, and every card can be opened. The content is only an example. Your own org chart shows your roles and duties.
Sending a request
- Click Get in touch. You'll find the button at the top of the page and again at the very bottom.
- Name and Email are already filled in from your account, Company and Phone from your team. Adjust them if needed.
- Add what you already know: Number of employees, Industry and the Monthly budget range. If you're not sure about the budget yet, choose not decided yet.
- Under What you expect, describe which tasks an agent should take over for you. You have up to 2,000 characters.
- Click Send request.
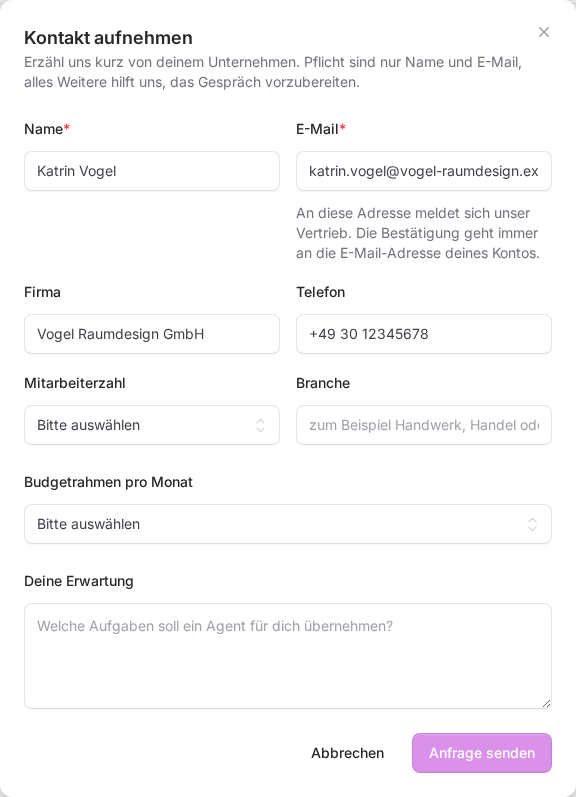
Only name and email are required. Everything else helps us prepare the conversation. The more specific you are about the tasks, the faster we can make you a proposal, for example: "sort incoming invoices and follow up on open items" or "prepare quotes using our template".
What happens next
After sending, you'll see the message "Thanks, we received your request. We will get back to you shortly." While the request is open, the overview page also shows Request received on with the date and time, so you can tell later that it's with us.
You'll get a confirmation email with the subject "We received your AI agent request". It explains the next steps:
- We look at your details and get back to you.
- Together we work out which tasks your agents should take over.
- After that we set everything up and you find your new team in the org chart.
If anything else comes to mind in the meantime, just reply to that email.
After setup: your first steps
As soon as your contract is running, the sidebar shows the actual areas instead of Overview: Org chart, AI agents, Board, Servers and Telephony. Owners, co-owners and people with full access to FlowAgents also see Plan, and anyone who may manage the team or FlowAgents also sees Team. Who sees which items is explained in Who can do what in FlowAgents?
These steps work well for getting started:
- Check the org chart: Open the Org chart and make sure each agent sits under the right person. Who an agent belongs to decides who works with it. More in Org chart overview.
- Bring in your colleagues: Link the people in your org chart to their accounts or invite them, see People in the org chart: link or invite a team member.
- Connect an AI subscription: Your agents think with your own ChatGPT or Grok subscription. How to sign in is described in Connect an AI subscription to an AI agent.
- Talk to your agent: The Telegram chat is the most direct line to your agent, see Working with your AI agent in Telegram. If an agent has no bot yet, you can connect it yourself, see Connect your AI agent to Telegram.
- Hand over a first task: Message your agent in the chat or create a card on your Board, see The board: assign tasks to AI agents.
Answers to common questions are collected in Frequently asked questions about FlowAgents.
Good to know
- Two email addresses: Our sales team replies to the address in the form. The confirmation always goes to your account email address, even if you entered a different one in the form.
- Access for your team: You give colleagues access to FlowAgents on the Team page or in the org chart when you link them to a role. How product rights work in the team is explained in Assigning product rights.
If something goes wrong
- "We could not send your request just now. Please try again in a moment.": Wait a moment and try again.
- You only see the overview although your team already has agents: Then you personally don't have access to FlowAgents. Ask your team owner to grant it, see Assigning product rights.
- Clicking Org chart or AI agents always leads to the overview: Your team doesn't have a FlowAgents contract yet. As soon as we've finished the setup, the areas open up.